lhw
AppFurnace
Introduction
Appfurnace is an easy-to-use mobile development website which enables you to drag and drop elements like buttons, images, and text elements and see what you are creating on the screen, which is an added benefit the novice user who would have limited knowledge of coding or professional application development. It allows you to create applications for Android and IOS devices and has tools to ensure compatibility among other screen sizes and operating systems. Appfurnace has an application to test run your created apps called ‘AppFurnace Player’ which allows the user to do a test run of the application, test the navigation of the app and test the functionality to uncover any bugs the system may have. After this the website allows you to publish the app.
AppFurnace is also a good tool for professional users who require more functionality out of a mobile application as it has a coding section where the user can write javascript code to the app.
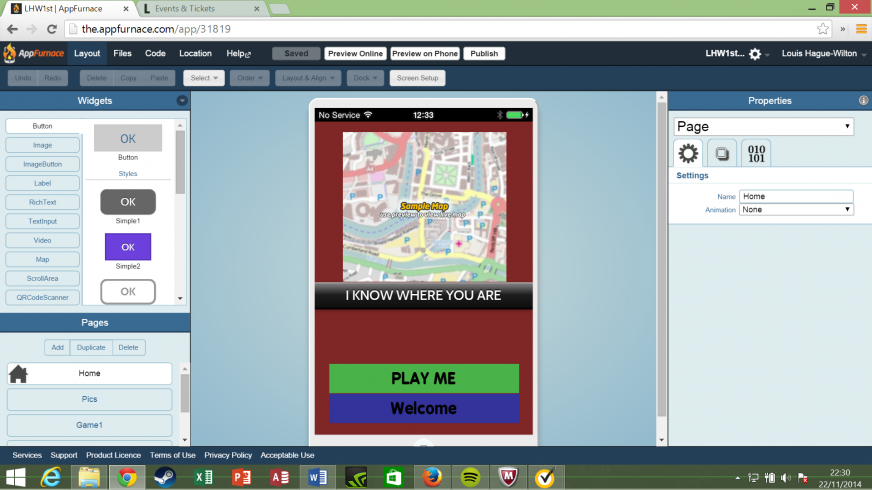
Here is an image of the appfurnace interface when you select ‘create a new app’. The interface is made up of 5 primary sections. At the top you have the toolbar which allows you to select between layout and code and also to view the files which are making up the app, for instance any images or videos or sounds which are used in the app. On the same toolbar is the option to save and preview online or on a mobile device. Clicking on preview on a mobile will bring up a QR code which can be scanned within the ‘AppFurnace Player’ player app and will then be transferred to the mobile device to view on that phone.
On the left side of the screen, there is the widgets and pages sections. The widgets section allows the user to simply drag and drop elements like buttons and image boxes to the layout section in the centre of the screen. This shows the user what they are making and what it will look like on the actual device. The pages section allows you to create new pages on the app and select which page to edit or view.
On the right side of the interface is the properties section. This allows you to alter the properties of the elements you add to the application. For example setting colours of buttons or making the buttons fixed to the top or bottom of the page. This is useful as you can expect your app to be used on devices of different sizes as the placement of key elements like buttons and images can be fixed in place and scaled depending on the screen size.
First App
My first app was a simple game as you can see here. It is a quiz game where by you click the answer and there is a pop up telling you if the answer you selected is the correct answer or not. I selected B as my answer and this is the pop up I got.
Final App
For my final idea, i originally planned to make a university budgeting app which would help university students manage their money better by telling the user how much money they had to spend on a day to day basis by having the user input a monthly budget and rent or other overhead costs and then subtracting the costs from the budget and dividing it through by how many days the user wanted. I started designing this app but decided not to take it further as I had trouble trying to write the code for the javascript calculations and with the time left to complete the app I thought it better to abandon that idea for now and proceed with a different idea.
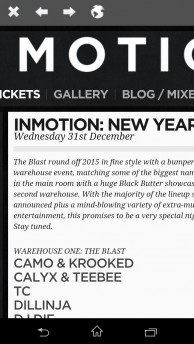
The next idea was a New Years Eve Bristol events app, which users could go onto and find events going on in some of Bristols most popular night clubs. Here is the App itself.
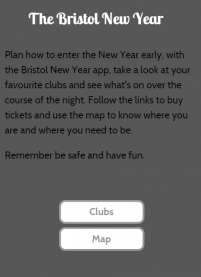
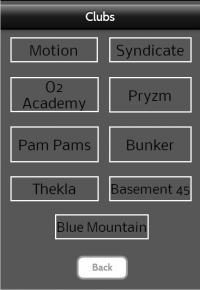
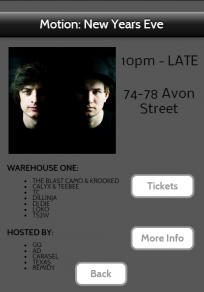
So a very simple app, you have a list of popular clubs and then a little info page telling you what time the event is, an address or street so you can use the integrated map function to find your club on the night, and with some events it will have a list of acts for the night on the event page aswell. There are also links on every event page that link to a ticketing office or page and also to the club webpage so the user can get any additional information they require about the event.
Left are the wire frame diagrams for the homepage and club page and the design for the club event pages.
Publishing the app
To publish the app, i would first have to complete testing on iOS and Android devices and then click publish on the appfurnace design interface. This would take me to an information page where i would have to select an app icon, add an app description and choose which operating systems to publish too. After this i would have to buy credits from appfurnace to publish the app and wait for the app package to be created which would take a couple days.
To publish to iphone, I would need to be signed up to the iOS developer program (which costs $99) and download the apple application loader program.
To publish to Android, I would need to register with google as a developer and compile data ready for publication. A bit like the information screen within appfurnace, i would need to input the app name, description, catagory of the app (whether it would be a game or productivity app) and i would need to input app icon sizes.
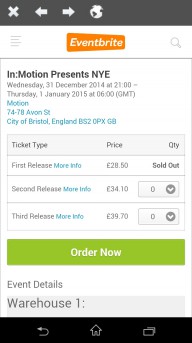
The two links on the motion event page, 'tickets' and 'More info' are hyperlinks to these two pages. The far left page is the ticket page for the event and the page next to that is the website of the club motion so the user can find out more information about the event if they need or want to.